Low Battery: Integrating a Modern Embroidery Motif into Creative Workflows
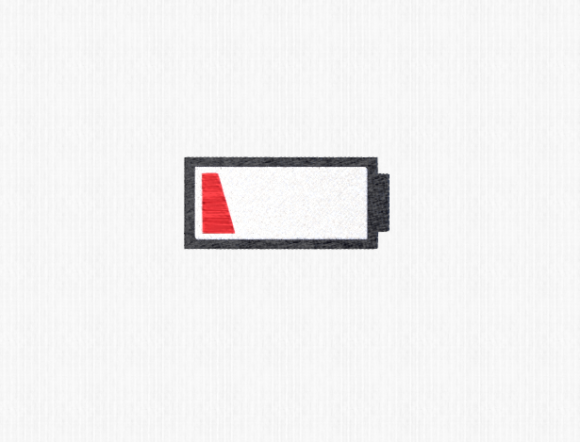
In the landscape of digital design and physical fabrication, symbols carry weight far beyond their visual simplicity. The Low Battery icon is universally recognized, transcending language barriers to communicate a specific state of depletion or urgency. When translated into machine embroidery, this graphic evolves from a mere interface warning into a playful, modern decorative element. For creators, small business owners, and hobbyists, understanding how to effectively integrate this design into tangible products requires more than just downloading a file. It demands a strategic approach to workflow, material compatibility, and aesthetic placement.
This article explores the practical implementation of the Low Battery embroidery design. We will examine how this motif fits into broader creative processes, from initial concept to final stitch-out, ensuring that your projects maintain high quality and professional consistency.
Understanding the Design’s Versatility in Product Development
The appeal of the Low Battery motif lies in its minimalist geometry and cultural relevance. Unlike intricate floral patterns or complex portraits, this design relies on clean lines and negative space. This simplicity makes it exceptionally versatile for various substrates. Whether you are decorating a plush towel, customizing a cotton t-shirt, or adding a quirky touch to a fleece blanket, the design scales well without losing definition.
For entrepreneurs and marketers, this versatility is a key asset. It allows for rapid prototyping across different product lines. You do not need to redesign the core asset for each item; instead, you adjust the scale and thread colors to match the medium. This efficiency reduces turnaround time and minimizes waste during the sampling phase. By treating the Low Battery design as a modular component of your brand’s visual language, you can maintain consistency while exploring diverse merchandise options.
Pre-Production: File Compatibility and Machine Preparation
Before the needle hits the fabric, successful execution depends on rigorous preparation. Machine embroidery designs are not universal; they come in various file formats tailored to specific hardware ecosystems. The Low Battery design typically arrives in a package containing multiple formats, such as PES, DST, JEF, and EXP. Understanding which format corresponds to your machine is the first critical step in your workflow.
- Format Selection: Always choose the native format for your machine when possible. Converting files can sometimes alter stitch density or pathing, leading to suboptimal results.
- Hoop Size Assessment: Determine the appropriate hoop size for your target item. A small battery icon may fit within a 4x4 inch hoop, ideal for shirt pockets or towel corners, while a larger version might require a 5x7 or 6x10 hoop for blanket centers.
- Stabilizer Choice: The substrate dictates the stabilizer. For stretchy fabrics like jersey knits used in t-shirts, a cut-away stabilizer provides necessary support. For woven towels, a tear-away may suffice, but a water-soluble topping can prevent stitches from sinking into the pile.
Organizing these digital assets efficiently is also part of the process. Maintain a structured folder system on your computer or USB drive. Label files clearly with both the format and the intended hoop size. This organizational habit saves valuable time during high-volume production runs and reduces the risk of selecting the wrong file under pressure.
Execution: Stitching Techniques and Quality Control
Once the file is loaded and the fabric is hooped, the execution phase begins. The Low Battery design, while simple, requires precision. The straight lines of the battery outline must be crisp, and the fill of the "low" portion needs to be dense enough to cover the fabric without causing puckering.
During the stitching process, monitor tension closely. Modern embroidery machines are sophisticated, but they still rely on proper thread tension to produce clean edges. If you notice looping on the underside of the fabric, adjust the bobbin tension before proceeding. For items like blankets, where the fabric is thick, ensure your needle is sharp and appropriate for the material weight to avoid skipped stitches.
Quality control should happen in real-time. Pause the machine after the outline is complete to check alignment. If the design is off-center, now is the time to correct it rather than discovering the error after the fill stitches are done. This proactive approach minimizes material waste and ensures that every piece meets professional standards.
Post-Production: Finishing and Presentation
The workflow does not end when the machine stops. Post-production steps are crucial for the longevity and appearance of the final product. Remove the item from the hoop carefully to avoid distorting the stitches. Trim any jump threads meticulously; loose threads can unravel over time, compromising the integrity of the design.
For towels and blankets, washing the item after embroidery can help remove any residual stabilizer marks and allow the fabric to relax around the stitches. However, always check the care instructions for both the fabric and the thread. Using heat-resistant threads ensures that the design withstands regular laundering without fading or shrinking disproportionately to the fabric.
Presentation matters, especially for sellers. Photograph the Low Battery design in context. Show the towel folded neatly or the shirt worn by a model. Highlight the texture of the stitches and the contrast between the thread and the fabric. These visual cues help customers appreciate the craftsmanship involved, adding perceived value to the item.
Integrating the Motif into Broader Creative Campaigns
Beyond individual items, the Low Battery design can serve as a thematic anchor for larger creative campaigns. Its association with energy levels, rest, and recharging resonates with contemporary audiences who value mindfulness and work-life balance. Marketers and content creators can leverage this symbolism to connect with their audience on an emotional level.
Consider using the design in a series of products aimed at relaxation. A "Low Battery" blanket paired with a "Recharging" mug creates a cohesive gift set. This thematic bundling encourages higher average order values and enhances brand storytelling. It transforms a simple embroidery pattern into a narrative device that speaks to the user’s lifestyle.
Furthermore, this design can be adapted for educational or corporate environments. Schools might use it for library quiet zones, while tech companies could incorporate it into breakroom decor. The key is to understand the context in which the symbol operates and to align the product’s application with that context.
Long-Term Usability and Asset Management
To maximize the return on investment for your embroidery designs, treat them as long-term assets. Regularly revisit your library of files, including the Low Battery design, to assess their performance. Keep records of which thread colors worked best on which fabrics. Note any adjustments made to tension or speed that improved the outcome.
This data-driven approach allows you to refine your process over time. As you introduce new materials or upgrade your machinery, you can reference these notes to quickly adapt the design for new conditions. Consistency in quality builds trust with your customers and establishes your reputation as a reliable creator.
In conclusion, the Low Battery embroidery design is more than a trendy graphic; it is a flexible tool in the modern maker’s toolkit. By approaching its implementation with a structured workflow—focusing on preparation, precise execution, and thoughtful post-production—you can create high-quality, meaningful products. Whether for personal enjoyment or commercial sale, integrating this design smoothly into your routine enhances both efficiency and creative satisfaction.